Most of the time, SwiftUI will do its Layout Magic and life will be wonderful. However, there are times (many times), when we require more control over the layout of our custom views. For these moments, we have several tools. The first one we are going to explore is GeometryReader.
What the Parent Wants
When coding your custom view, you often do not need to worry about surroundings or sizing. For example, if you need to create a view that draws a rectangle, you just draw a rectangle. It will be drawn with the size and position intended by the parent.
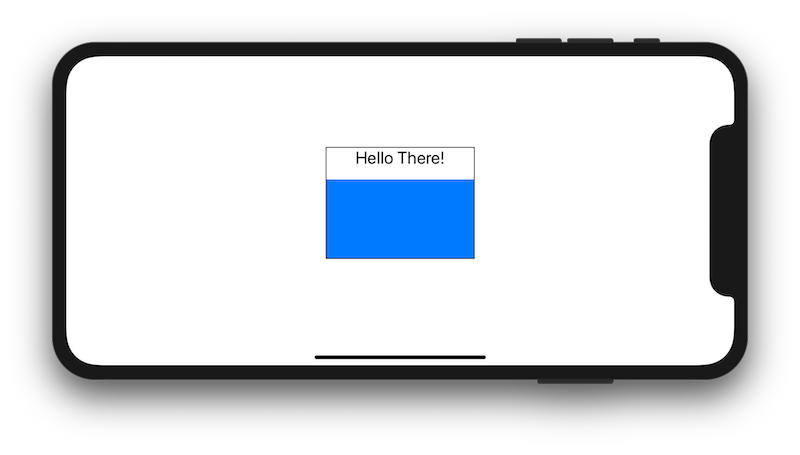
In the following example, we have a VStack with a size of 150×100. It first puts the Text on the top and then the remaining space is passed to MyRectangle(). This view is very obedient and paints in blue exactly what has been given. Not a pixel more, not a pixel less:
struct ContentView : View {
    var body: some View {

        VStack {

            Text("Hello There!")
            MyRectangle()

        }.frame(width: 150, height: 100).border(Color.black)

    }
}

struct MyRectangle: View {
    var body: some View {
        Rectangle().fill(Color.blue)
    }
}
As you can see, the view MyRectangle() does not worry about size. It only does one job, draw a rectangle. Let SwiftUI figure out where and how big the parent wants it. In this case, the containing VStack is such parent.
If you would like to learn more about how parents determine size and position for their children, I strongly suggest you watch the 2019 WWDC session 237 (Building Custom Views with SwiftUI).
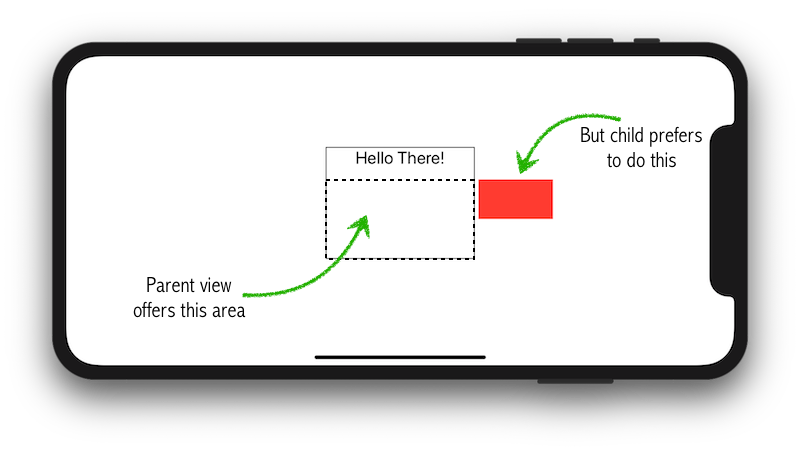
In many cases, this would be enough. However, as explained on session 237, parents suggest a size and position, but it is up to the child view to decide where and how to draw itself. If the child view is not happy with what its was offered, then he can just ignore it.
For example, if you want your custom view to draw a rectangle with half the size of the one suggested by your parent, and if you want to positioned it 5 points to the right edge of the suggested location, then so be it. Nobody will tell you otherwise.
So how do we go off script here? It turns out, is not that complicated. Here is where GeometryReader comes to the rescue.
What the Child Does
Let’s begin by actually looking to the documentation Apple provides about GeometryReader:
A container view that defines its content as a function of its own size and coordinate space.
Comparing to other entries that only say “No overview available”, we can consider ourselves lucky!
But what does this mean anyway? Well basically, GeometryReader is yet another view! Surprised? I guess you’re not by now. Almost everything is a view with SwiftUI! As you will see in the example below, GeometryReader lets YOU define its contents, but unlike other views, you also have access to some useful information you can seize to do your thing in the process.
Consider the exercise we mentioned before: Make a view that draws a rectangle with half the size of the parent’s suggestion and positions it 5 points to the right side of the suggested area. Now that we have GeometryReader, it is very simple:
struct ContentView : View {
    var body: some View {

        VStack {

            Text("Hello There!")
            MyRectangle()

        }.frame(width: 150, height: 100).border(Color.black)

    }
}

struct MyRectangle: View {
    var body: some View {
        GeometryReader { geometry in
            Rectangle()
                .path(in: CGRect(x: geometry.size.width + 5,
                                 y: 0,
                                 width: geometry.size.width / 2.0,
                                 height: geometry.size.height / 2.0))
                .fill(Color.blue)

        }
    }
}
GeometryProxy
When looking carefully to the example above, you will see a closure variable named geometry. This is a variable of type GeometryProxy. That struct has many tricks up its sleeve. We will uncover a few now, and some other with the Inspecting the View Tree article.
From its definition, we can see there are two computed variables, one function, and a subscript getter:
public var size: CGSize { get }
public var safeAreaInsets: EdgeInsets { get }
public func frame(in coordinateSpace: CoordinateSpace) -> CGRect
public subscript<T>(anchor: Anchor<T>) -> T where T : Equatable { get }
The first one is straight forward. As seen in the example, size is a property that contains the size suggested by the parent. We may honour it or not. But remember, that is up to us, the children.
The safeAreaInsets are also exposed through the GeometryProxy.
The frame function let us obtain a rect of the suggested area, using different coordinate spaces. We can pass .local, .global or a .named() coordinate space. Local and global are self-explanatory. Named coordinate spaces, however, let a view name its own coordinate space which can later be references by other views. The best way to learn how to use them, is by example. Check Inspecting the View Tree, where there is one that uses it.
Finally, we have a subscript getter with a weird Anchor<T> type. Intrigued? You should be. It is a fascinating feature of the GeometryReader but it is also a heavy topic, which I explain in the second part of Inspecting the View Tree. For now, you should know that using that subscript, you can get the size and position of any subview down the view tree. Powerful, isn’t it? Make sure you come back to learn more about it.
Absorbing the Geometry of Another View
GeometryReader is very powerful, but if used in combination with the .background() or .overlay() modifier, it can be even more powerful.
In most tutorials I have seen, background is used in its simplest form. For example: Text("hello").background(Color.red). At first glance we may fail to realise that, Color.red, is not just a parameter indicating that the color should be red. No, Color.red is yet another view! Its only function is to fill the area suggested by its parent with the red color. Because its parent is background, and background modifies Text, the area suggested to Color.red is the area occupied by the view Text("hello"). Beautiful, isn’t it?
The .overlay modifier does exactly the same, but instead of drawing its contents behind the modified view, it draws them in front of it.
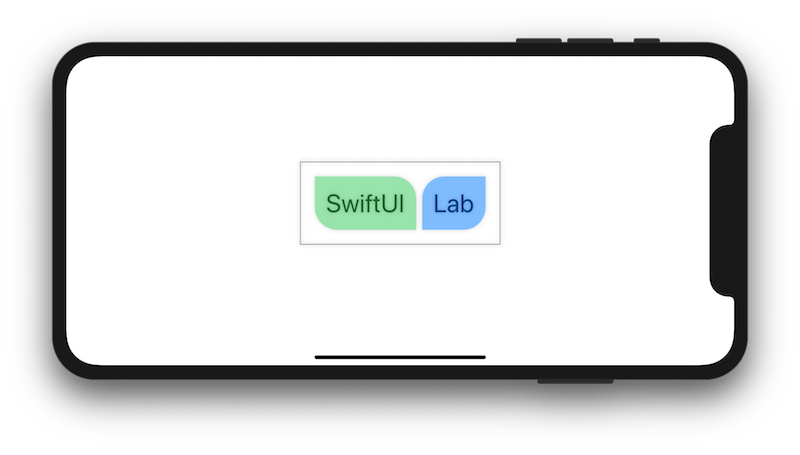
You probably already figure out that you can provide any view to .background(), not only Color(). To illustrate how we can take advantage of that, we will combine it with GeometryReader. Let’s create a view that draws a rectangular background, with the possibility of specifying a different radius to each corner:
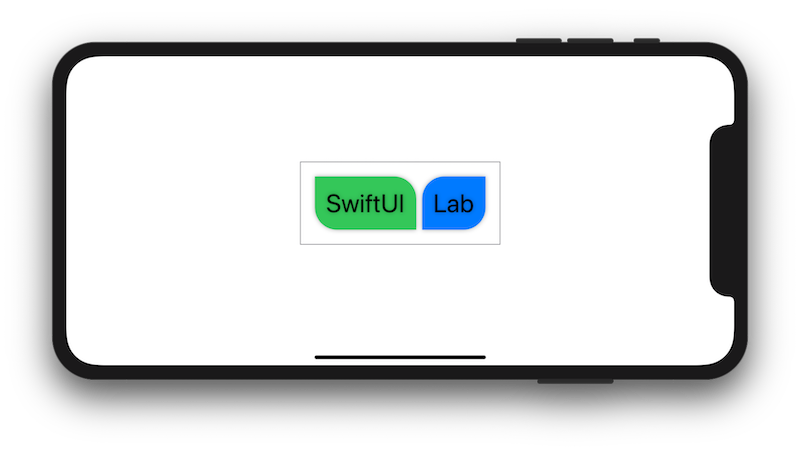
The implementation would look like this:
struct ContentView : View {
var body: some View {
HStack {
Text("SwiftUI")
.foregroundColor(.black).font(.title).padding(15)
.background(RoundedCorners(color: .green, tr: 30, bl: 30))
Text("Lab")
.foregroundColor(.black).font(.title).padding(15)
.background(RoundedCorners(color: .blue, tl: 30, br: 30))
}.padding(20).border(Color.gray).shadow(radius: 3)
}
}
struct RoundedCorners: View {
var color: Color = .black
var tl: CGFloat = 0.0 // top-left radius parameter
var tr: CGFloat = 0.0 // top-right radius parameter
var bl: CGFloat = 0.0 // bottom-left radius parameter
var br: CGFloat = 0.0 // bottom-right radius parameter
var body: some View {
GeometryReader { geometry in
Path { path in
let w = geometry.size.width
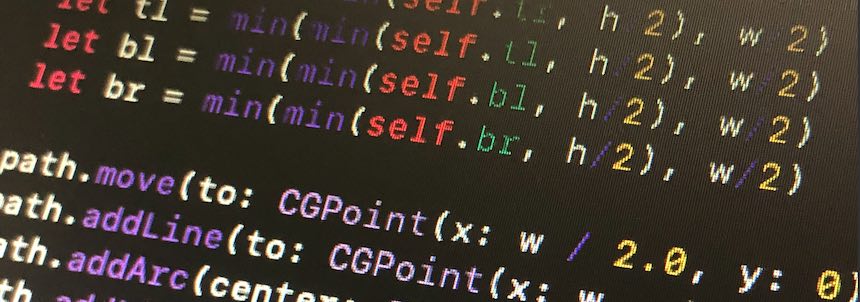
let h = geometry.size.height
// We make sure the radius does not exceed the bounds dimensions
let tr = min(min(self.tr, h/2), w/2)
let tl = min(min(self.tl, h/2), w/2)
let bl = min(min(self.bl, h/2), w/2)
let br = min(min(self.br, h/2), w/2)
path.move(to: CGPoint(x: w / 2.0, y: 0))
path.addLine(to: CGPoint(x: w - tr, y: 0))
path.addArc(center: CGPoint(x: w - tr, y: tr), radius: tr, startAngle: Angle(degrees: -90), endAngle: Angle(degrees: 0), clockwise: false)
path.addLine(to: CGPoint(x: w, y: h - br))
path.addArc(center: CGPoint(x: w - br, y: h - br), radius: br, startAngle: Angle(degrees: 0), endAngle: Angle(degrees: 90), clockwise: false)
path.addLine(to: CGPoint(x: bl, y: h))
path.addArc(center: CGPoint(x: bl, y: h - bl), radius: bl, startAngle: Angle(degrees: 90), endAngle: Angle(degrees: 180), clockwise: false)
path.addLine(to: CGPoint(x: 0, y: tl))
path.addArc(center: CGPoint(x: tl, y: tl), radius: tl, startAngle: Angle(degrees: 180), endAngle: Angle(degrees: 270), clockwise: false)
}
.fill(self.color)
}
}
}Alternatively, we may use the same view, with a 0.5 opacity, and put it over the text, using .overlay() instead of .background():
The code looks like this:
Text("SwiftUI")
    .foregroundColor(.black).font(.title).padding(15)
    .overlay(RoundedCorners(color: .green, tr: 30, bl: 30).opacity(0.5))
Text("Lab")
    .foregroundColor(.black).font(.title).padding(15)
    .overlay(RoundedCorners(color: .blue, tl: 30, br: 30).opacity(0.5))
Chicken or The Egg Problem
When you start using GeometryReader, you will (sooner or later), stumble upon what I call the “Chicken or The Egg” problem. Because GeometryReader needs to offer all the space available to its child, it first needs to expand to occupy as much as possible. Then, as we’ve seen, the child may decide to use less area. However, GeometryReader will still remain large.
You may be tempted, once the child has determine its space requirement, to force GeometryReader to shrink accordingly. But this in turn makes the child react to the new size computed by GeometryReader… and there you have it, all the ingredients required to get a nice recurring loop!
So… what came first? Does the child depend on the parent’s size? Or does the parent depend on its child’s size? When you face this problem, you will need to take a step back and re-think your approach. Creativity will be paramount to get out of the situation. And who knows, maybe GeometryReader is not the right fit to achieve your particular layout goals this time. Fortunately, GeometryReader is not the only layout tool you have to your disposal. Case in point, my next article on Preferences and Anchor Preferences.
Summary
Today we learnt how we can use GeometryReader to make custom views aware of their size and placement on screen. We also learnt some helpful tips to “steal” the geometry of other views and use it to our advantage.
This is only the first of many articles that will be devoted to explaining the undocumented layout tools provided by SwiftUI. Next, we are going to dive into view tree hierarchies and how we can make child views send data upwards. Check it out here.
Please feel free to add your comment below.
Just perfect. Thanks.
I can’t wait for more! Keep it up!
Definitely one of the best and inspiring articles around the new topic. Looking forward for more, too.
Thank you! I’ll post Inspecting the View Tree – part 2, next Monday. We’ll see Anchor<CGRect> and Anchor<CGPoint> preferences in action.
Great article on an interesting topic…nice job!
Thank you for taking the time share your knowledge!
Really looking forward to the View Tree articles
We all learn by sharing what we know
Tanks. Very useful information. Easy to understand.
Many thanks for your work.
Wow, thanks for this and the other articles on the view tree. I held off from using SwiftUI until the GM Seed appeared – too many painful experiences of pre-release software. I have just spent several days trying to manage view layout and completely missed Preferences in the WWDC video. That and Geometry are a life saver, so thanks again for sharing your work.
You’re welcome! 😉
Thank you for beginning this course of articles! It’s very much useful, especially as there’s not much info out the on SwiftUI.
I’m into SwiftUI for only a few days right now, but I’ve already come across the problem of not being able to put the variables to the right place. In the definition of RoundedCorners, we put w and h vars into Path’s closure and it works just fine. But if I move the same variable one level up so that they’re defined in GeometryReader, I’ve got the following errors:
– Cannot convert return expression of type ‘GeometryReader’ to return type ‘some View’
– Type of expression is ambiguous without more context
Could you please explain what is this error about and why it emerges in one closure and not another?
That is one of the most commons errors in SwiftUI. Maybe you don’t realize it, but usually, you are returning a value (most of the time of type “some View”). However, in most examples, you do not see the return statement. This is because Swift can now understand you are returning a value, but only if there is a single statement. As soon as you have more than one statement in the closure, you need to explicitly use the return keyword.
Thanks for the detailed explanation. I’m using the GeometryGetter() but can’t quite place a second view relation to a parent view.
I was hoping you could look at this:
https://stackoverflow.com/questions/58513331/how-to-position-a-list-using-zstack-geometry
Hi there, I posted some comments on your StackOverflow question.
Hello Javier, Yarm,
I ran into a similar challenge and found Yarms Stackoverflow question. I could not get the .coordinateSpace(„Zstack“) to work as expected. Seems such a use case it not working, right? Is it at bug? Could not find an accepted answer to this use case.
Add on: my experience is that .named() and .global coordinateSpaces (except for the simplest setups) always deliver the same result. As if it .named() is really buggy.
Now I know how to make a grid, thanks
HI! It is so great article! Thank you!
Hi,
Thank you for this amazing topic!
There is a small error:
`path.move(to: CGPoint(x: w / 2.0, y: 0))` should be `path.move(to: CGPoint(x: tr, y: 0))`.
Thanks (again) Javier for another fantastic article. Took me 7 months to the day to stumble upon your site and I am very grateful I did. Great writing + web skills as well.
Love the tutorials on the website, they’re all amazing
though I’m having trouble understanding the math in the
let tr = min(min(self.tr, h/2), w/2)
let tl = min(min(self.tl, h/2), w/2)
let bl = min(min(self.bl, h/2), w/2)
let br = min(min(self.br, h/2), w/2)
part
can someone explain it in more details for me please?
The min(min()) is there to avoid the value exceeding workable values.
Great article! It helps a lot! Can’t wait for more articles about the SwiftUI.
I’m not sure how yours compiles.
GeometryReader
{
geometry in
Circle().stroke(Color.black, lineWidth: 4)
VStack
{Text(“some text”).background(GeometryProxy($rect))
With this, I get: ‘GeometryProxy’ cannot be constructed because it has no accessible initializers
Hi Warren, your GeometryReader closure should return a View, but yours doesn’t. Your code is not complete, so it is hard to know what you are trying to achieve, but begin by putting the Circle view and the following VStack inside a container, so you group them into a single view returned by the GeometryReader closure.
Thank you very much for those excellent articles. They help me a lot.
Thanks for creating this, got me out of a sticky corner. I have minor suggestions for readability.
Radius, not redius.
Could be made more clear that tl, tr, bl, br are the radius parameters you describe as “possibility of specifying a different radius to each corner”, and 0.0 is their radius that must be edited in code to specific. I spent some time looking for how those were updated, understanding them to be coordinates. A comment in the code would be perfect.
Thanks!
Radius typo corrected.
tl, tr, bl and br stand for top-left, top-right, bottom-left and bottom-right radius. I added a comment in code.
Way Cool.
Another cool thing about SwiftUI is that I’m able to run tutorials like this on an iPad in Playgrounds !!! Makes learning so convenient when I’m out and about … playing with the code.
Except … not any longer … the latest update of Swift Playgrounds (version 3.4) has rendered running any SwiftUI code worthless.
Just Wowww!!!!!
Thanks 🙂