Welcome to a new installment of the Advanced SwiftUI Animations series. I initiated this collection of articles back in 2019. Since then, Apple has been enhancing the framework and introducing new features. This year is no exception, with exciting additions that expand the possibilities of SwiftUI animations.
As always, my goal is to explore every aspect of the framework, and that means I won’t be able to cover everything in a single post. As in previous installments, the new additions for this year will also be presented in multiple parts.
Throughout the new posts, we will discuss topics such as the Animation type and the CustomAnimation protocol, new ways to work with Transactions, and new options to specify animations. We will also discuss the new PhaseAnimator and KeyframeAnimator views and methods.
Along the way, I will also provide debugging tips for situations where your animations don’t behave as expected. Let’s get started!
Introduction
This part of the series will explore the new CustomAnimation protocol. In the past, once an animation got started, there was little that could be done besides interrupting it. This year, with custom animations, it is possible to interact during the animation. Bellow is an example of a custom .variableSpeed animation I created. Although it is a linear, it will let you alter its speed during its run:
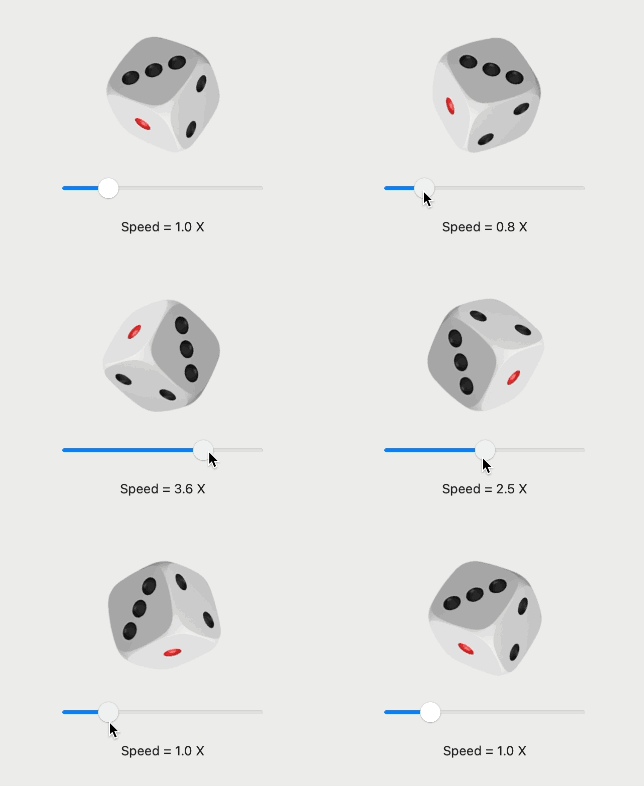
All examples, including the variableSpeed animation, are available in a single gist file that you can copy/paste directly into Xcode.
Note that the examples in this post are not very flashy, they are as plain and simple as possible. This is intentional and aims to focus on one concept at a time.
For more on this topic, I recommend you also check Apple’s WWDC’23 video Explore SwiftUI Animation.
The Animation type
The withAnimation() and animation() methods you already know, receive an Animation value as a parameter. But what is the purpose of an Animation? In simple words, the Animation type value tells SwiftUI how long the animation runs and also indicates how to interpolate the animatable property of the view from its original to its changed value.
For example, a linear Animation produces even changes from the beginning to the end, while an easeIn Animation will progressively accelerate the amount of change at the beginning and then stabilize into almost linear changes.
We have been using this extensively over the years. For example, in the following code:
withAnimation(.easeInOut) { ... }

withAnimation(.easeInOut(duration: 2.0)) { ... }
If you look closely at the SwiftUI declaration file you will find:
extension Animation {
    static var easeInOut: Animation { get }

    static func easeInOut(duration: TimeInterval) -> Animation
}
This makes it possible to write .easeInOut, instead of Animation.easeInOut, because the compiler is already expecting an Animation and knows that the dot syntax has to refer to a static variable (or static function).
Until now, we’ve been limited to using one of the pre-built animations (.linear, .spring, .interactiveSpring, .easeIn, .easeOut, .easeInOut, .bouncy, and more). They are usually available as static variables with pre-configured values or as static functions with parameters that let you customize them.
Starting in 2023, we can add to this pool of pre-built animations. This is what this part of the series is all about.
Using Custom Animations
New this year, is the possibility of creating our own custom animations. To do so, we just create a type that adopts the CustomAnimation protocol. Then you use such animation like this:
withAnimation(Animation(MyCustomAnimation())) { ... }And to follow the pre-built animation style, you can create your own Animation extension:
extension Animation {
    var myAnimation: Animation { Animation(MyCustomAnimation()) }
}
Because we extended Animation, our code will be simplify to:
withAnimation(.myAnimation) { ... }VectorArithmetic Protocol
Because in the next sections we will extensively use types that need to conform to VectorArithmetic, it is worth spending some time refreshing what it is and why it is useful. You may already be familiar with it, especially if you read the first part of this blog post series, so feel free to skip this part if you already know what a VectorArithmetic type is.
We use VectorArithmetic for types that can represent a vector. In this context (SwiftUI animations), think of a vector as an n-tuple of values that can be animated. These values are advanced through the animation, by scaling or interpolating them. Conveniently, the protocol has functions that let you both scale an interpolate.
Examples of types that already adopt VectorArithmetic are Double and CGFloat. You can also make your own types conform to this protocol. For an example, check Advanced SwiftUI Animations: Part 1 and look for section Making Your Own Type Animatable.
Double and CGFloat by themselves are each a 1-tuple, but we need to be able to handle n-tuples. That is, vectors with any number of values. For this purpose, there is a type called AnimatablePair. This type also conforms to VectorArithmetic but essentially encapsulates two VectorArithmetic values. So now, we can handle 2-tuples. Fortunately, because one of those values can also be an AnimatablePair, we get a 3-tuple, if both values are AnimatablePair, you get a 4-tuple, and so on. That way you can specify any number of components for your vector. To illustrate this, consider a vector that needs to hold a scale (CGFloat), an opacity value (Double) and a rotation angle (Double). Our 3-tuple vector would be defined as:
let v: AnimatablePair<AnimatablePair<CGFloat, Double>, Double>

v = AnimatablePair(AnimatablePair(10.0, 0.2), 90.0)
For more detailed examples, please refer to Advanced SwiftUI Animations: Part 1 and look for the sections titled Animating More Than One Parameter and Going Beyond Two Animatable Parameters.
Fortunately, in order to implement your custom animation, you don’t need to know how many components the vector has. This is because we operate on the vector as a whole. Any interpolation or scaling we perform on it, will be done on all its components automatically, whether it’s a 1-tuple, 5-tuple, or any n-tuple the system is using behind the scenes.
CustomAnimation: func animate()
To create a custom animation, there is only one required method: animate(), and two optional methods: shouldMerge() and velocity(). We’ll deal with the optional methods later, so let’s focus on the most important:
func animate<V>(value: V, time: TimeInterval, context: inout AnimationContext<V>) -> V? where V : VectorArithmeticThe purpose of your implementation is to determine how the animatable values will change during the animation. This function is called repeatedly by the system, and our job is to return the updated animatable values. This continues until we return nil to end the animation. The system will stop calling animate() after that.
The first parameter is our vector (which contains all animatable values), the second parameter is how much time has elapsed since the animation began, and the last parameter is an inout animation context. This context can be used to persist data between calls to the function and also allows us to read the environment of the animated view.
The beauty of this is that our code will be agnostic to the actual value(s) being animated. It can be a 1-tuple with opacity, or a 3-tuple with opacity, scale, and rotation, or whatever combination of animatable values the user of our CustomAnimation is changing. Most of the time, we are also that user, but we can design a custom animation without knowing what is going to be animated.
To make our job easier, we will not be animating from the initial value to its final value, but rather the delta between them. In other words, if we are animating opacity from 0.5 to 0.8, in reality, we will be animating from 0.0 to 0.3.
In most scenarios (although not necessarily), we usually return value.scaled(by: 0.0) at the beginning of the animation and value.scaled(by: 1.0) at the end. What you do in the middle will determine the curve of your animation.
But let’s begin coding our first custom animation, implementing the most basic: a linear animation.
Linear Animation (Example #1)
struct MyLinearAnimation: CustomAnimation {
    let duration: TimeInterval

    func animate<V>(value: V, time: TimeInterval, context: inout AnimationContext<V>) -> V? where V : VectorArithmetic {
        guard time < duration else { return nil }

        return value.scaled(by: time/duration)
    }
}

// For convenience and code readability, we extend Animation
extension Animation {
    static func myLinear(duration: TimeInterval) -> Animation { Animation(MyLinearAnimation(duration: duration)) }

    static var myLinear: Animation { Animation(MyLinearAnimation(duration: 2.0)) }
}
Then we can use our custom animation as we would with any other built-in animation. In this case, we are also adding a delay() and a repeatForever() method (which are part of the Animation type that contains our CustomAnimation). No extra work is needed for that to function!

struct ExampleView: View {
@State var animate: Bool = false
var body: some View {
Text("😵💫")
.font(.system(size: 100))
.rotationEffect(.degrees(animate ? 360 : 0))
.task {
withAnimation(.myLinear.delay(1).repeatForever(autoreverses: false)) {
animate.toggle()
}
}
}
}The following table shows the values in several calls to the animate() function as time progresses:
| time | time/duration | value.scaled(by: time/duration) |
|---|---|---|
| 0.0 | 0.0 | 0 |
| 0.2 | 0.1 | 36 |
| 0.4 | 0.2 | 72 |
| 0.6 | 0.3 | 108 |
| 0.8 | 0.4 | 144 |
| 1.0 | 0.5 | 180 |
| 1.2 | 0.6 | 216 |
| 1.4 | 0.7 | 252 |
| 1.6 | 0.8 | 288 |
| 1.8 | 0.9 | 324 |
| 2.0 | 1.0 | 360 |
| > 2.0 | – | nil |
Also, note that animation duration is not a concept SwiftUI is aware of. It is up to the animate() function to determine when to stop. In this case, we conveniently define a duration property, and we end the animation when the time is no longer lower than duration. SwiftUI knows the animation is over because we return nil; otherwise, it would keep calling animate().
CustomAnimation’s AnimationContext
In the previous example, we used the value and time parameters, but context was not necessary. Next, let’s see an example where it is.
The context parameter in the animate() function has multiple uses. It may be used to read the view’s environment, but you can also use it to store information that needs to persist across calls to the CustomAnimation methods. We will explore both cases.
AnimationContext: Environment Use Case (Example #2)
Consider the following example. This new custom animation is called .random, and as you may have already guessed, it scales the value randomly. In this case, however, we are not defining a duration, so the animation never ends.

struct ExampleView: View {
    @State var animate = false

    var body: some View {
        Text("😬")
            .font(.system(size: 100))
            .offset(x: animate ? -3 : 3, y: animate ? -3 : 3)
            .animation(.random, value: animate)
            .task {
                animate.toggle()
            }
    }
}

extension Animation {
    static var random: Animation { Animation(RandomAnimation()) }
}

struct RandomAnimation: CustomAnimation {
    func animate<V>(value: V, time: TimeInterval, context: inout AnimationContext<V>) -> V? where V : VectorArithmetic {
        return value.scaled(by: Double.random(in: 0...1))
    }
}
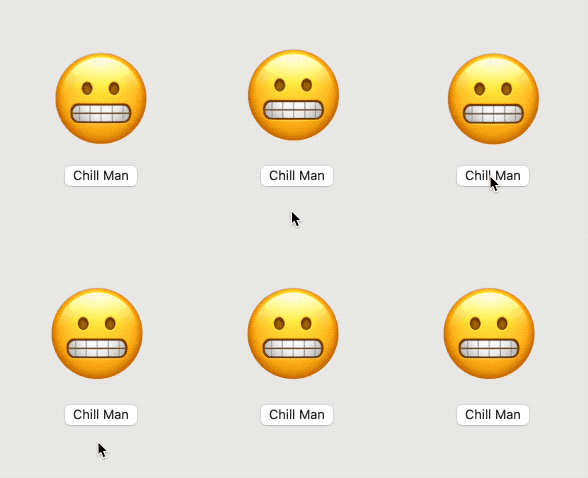
Now let’s see how we can communicate with the animate() function from the view, in order to make it stop by the press of a button.
To be able to communicate with an ongoing animation, we do so through the view’s environment. Our custom implementation can read the view’s environment at any time through the context parameter. You can access any of the existing environment values, but that would not help here. In our case, we will create a custom EnvironmentValue specific to our needs. Note that this is not new; we’ve been able to create custom EnvironmentValue items since SwiftUI was introduced. If you want to learn more about it, check EnvironmentKey.
Our custom environment value will be a boolean, with a false value as default, and we will call it stopAnimation:
extension EnvironmentValues {
    var stopRandom: Bool {
        get { return self[StopRandomAnimationKey.self] }
        set { self[StopRandomAnimationKey.self] = newValue }
    }
}

public struct StopRandomAnimationKey: EnvironmentKey {
    public static let defaultValue: Bool = false
}
Now we can add a button to change the environment value:
struct ExampleView: View {
    @State var animate = false
    @State var stop = false

    var body: some View {
        VStack {
            Text("😬")
                .font(.system(size: 100))
                .offset(x: animate ? -3 : 3, y: animate ? -3 : 3)
                .animation(.random, value: animate)
                .task {
                    animate.toggle()
                }
                .environment(\.stopRandom, stop)

            Button("Chill Man") {
                stop.toggle()
            }
        }
    }
}
Then it is up to our animate() function to check for the stopAnimation environment value at every call. We simply return nil when stopAnimation is true.
extension Animation {
    static var random: Animation { Animation(RandomAnimation()) }
}

struct RandomAnimation: CustomAnimation {
    func animate<V>(value: V, time: TimeInterval, context: inout AnimationContext<V>) -> V? where V : VectorArithmetic {

        guard !context.environment.stopRandom else { return nil }

        return value.scaled(by: Double.random(in: 0...1))
    }
}
As you can see, the environment in the context is not a snapshot at the time the animation starts, but rather a live instance of the view’s environment at the time it is being accessed.
The ability to alter the behavior of an ongoing animation opens a world of opportunities!
AnimationContext: Data Persistence Use Case (Example #3)
Now, to explore the data persistence use case, we will expand on the same example.
When the user stops the animation, the effect is abrupt. However, now we want to make our jittery character to cool down slowly:
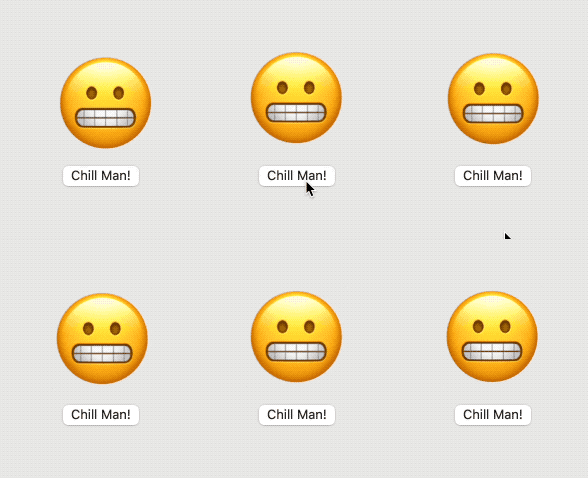
In addition to indicating when to stop, we need a way for the animation to progressively fade the effect across an arbitrary amount of time.
To add our own data to the context, we need to define an AnimationStateKey. This process is very similar of how you define new EnvironmentValue keys:
private struct RandomAnimationState<Value: VectorArithmetic>: AnimationStateKey {
    var stopRequest: TimeInterval? = nil

    static var defaultValue: Self { RandomAnimationState() }
}

extension AnimationContext {
    fileprivate var randomState: RandomAnimationState<Value> {
        get { state[RandomAnimationState<Value>.self] }
        set { state[RandomAnimationState<Value>.self] = newValue }
    }
}
The data we want to persist is the time of the animation when the stop request was performed. With this value and the time parameter of the animate() function, we can now determine how much time has elapsed since the user requested to stop. As time goes by, we decrease the randomness of the animation more and more until we eventually end it by returning nil.
We will also add a custom parameter to our animation (fadeTime) that will let us customize how long it will take for the animation to end after the user requested it through the environment.
extension Animation {
    static func random(fade: Double = 1.0) -> Animation { Animation(RandomAnimationWithFade(fadeTime: fade)) }
}

struct RandomAnimationWithFade: CustomAnimation {
    // time to fade randomness since stop starts to end of animation
    let fadeTime: Double

    func animate<V>(value: V, time: TimeInterval, context: inout AnimationContext<V>) -> V? where V : VectorArithmetic {

        if context.environment.stopRandom { // animation stop requested
            if context.randomState.stopRequest == nil {
                context.randomState.stopRequest = time
            }

            let randomIntensity = (time - context.randomState.stopRequest!) / fadeTime

            if randomIntensity > 1 { return nil }

            return value.scaled(by: Double.random(in: randomIntensity...1))
        } else {
            return value.scaled(by: Double.random(in: 0...1))
        }
    }
}
Now our view code will slightly change to specify the fade time (2.0 seconds):
struct ExampleView: View {
    @State var animate = false
    @State var stop = false

    var body: some View {
        VStack(spacing: 10) {
            Text("😬")
                .font(.system(size: 100))
                .offset(x: animate ? 0 : 6, y: animate ? 0 : 6)
                .animation(.random(fade: 2.0), value: animate)
                .task {
                    animate.toggle()
                }
                .environment(\.stopRandom, stop)

            Button("Chill Man!") {
                stop.toggle()
            }
        }
    }
}
Restarting the Animation
In the above examples, if you press the button again, you will notice the animation won’t resume. That is because when you stopped it, the animate() function returned nil. When this happens, SwiftUI removes the animation, and it no longer exists. To restart it, you need to create a new animation by triggering it again:
Button("Chill Man!") {
    stop.toggle()

    if !stop { animate.toggle() }
}
CustomAnimation: func shouldMerge()
When creating a new animation, SwiftUI will determine if there is already a running animation for the same view property. If so, it will ask the new animation how it wants to handle that. This is decided in the implementation of the interrupting animation’s shouldMerge() method.
Your implementation returns a boolean value. If you return false (this is the default if left unimplemented), both animations (old and new) will run their course, and their results will be combined by the system.
However, if you return true, this indicates that you want the new animation to merge with the previous one. The system will remove the original animation and continue with your new animation. To properly merge, the shouldMerge method receives some useful information that can be later used by your animate() implementation:
func shouldMerge(previous: Animation, value: V, time: TimeInterval, context: inout AnimationContext<V>) -> BoolThe previous parameter provides the original animation to merge with. We also receive the value to animate towards, the elapsed time so far, and the animation context.
This is better understood with an example.
Merging Animations (Example #4)
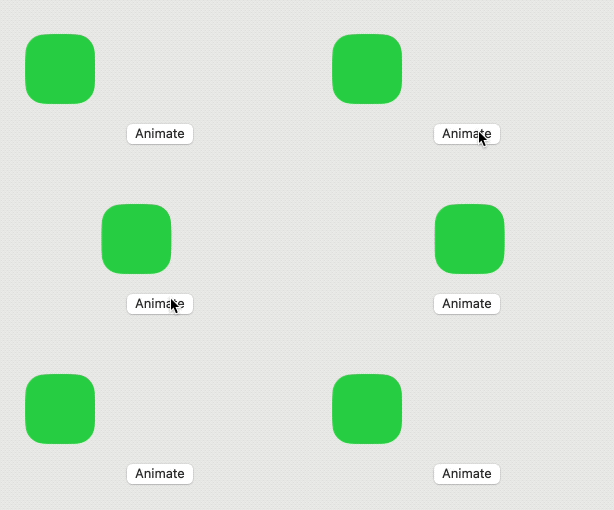
Consider the system’s .linear animation. This animation’s shouldMerge() method returns false and allows the system to combine both animations. In the following example, a linear animation is interrupted by another linear animation. You will notice that this results in a deceleration and acceleration of the overall animation.
To test it, simply click twice on the animate button:
struct ExampleView: View {
    @State var offset: CGFloat = -100.0

    var body: some View {
        VStack(spacing: 20) {
            RoundedRectangle(cornerRadius: 20)
                .fill(.green)
                .frame(width: 70, height: 70)
                .offset(x: offset)

            Button("Animate") {
                withAnimation(.linear(duration: 1.5)) {
                    offset = (offset == 100 ? -100 : 100)
                }
            }
        }
    }
}
Returning false (or leaving the function without implementation) is the easiest route, but sometimes the results may not be what we want. For those cases, let’s explore how we can take advantage of shouldMerge().
We are going to work with the myLinear animation from the first example, but instead of letting SwiftUI combine animations, we want to avoid the deceleration/acceleration that results from combining. For our example, we want our animation to be linear at all times, even when an interruption occurs.
Returning true in shouldMerge() is not enough; we need to add some logic for this to work. The animate() method needs some extra information to keep it linear. In addition to using shouldMerge() to tell SwiftUI to merge, we are going to take the opportunity to save some data from the original animation that is going to be needed in the new one. We are going to use the context to persist this information. Unlike the previous example where the context was saving a single value (TimeInterval), we are now going to create a custom type (MyLinearState), which will store the time of the interruption and the value at the time it was interrupted.
struct MyLinearState<Value: VectorArithmetic>: AnimationStateKey {
    var from: Value? = nil
    var interruption: TimeInterval? = nil

    static var defaultValue: Self { MyLinearState() }
}

extension AnimationContext {
    var myLinearState: MyLinearState<Value> {
        get { state[MyLinearState<Value>.self] }
        set { state[MyLinearState<Value>.self] = newValue }
    }
}
Note that in our shouldMerge(), we will use the previous parameter to query the original animation for its value at the time of the interruption:
    func shouldMerge<V>(previous: Animation, value: V, time: TimeInterval, context: inout AnimationContext<V>) -> Bool where V : VectorArithmetic {

        context.myLinearState.from = previous.base.animate(value: value, time: time, context: &context)
        context.myLinearState.interruption = time

        return true
    }
Now our animate() implementation will use this information to properly animate when replacing an interrupted animation:
func animate<V>(value: V, time: TimeInterval, context: inout AnimationContext<V>) -> V? where V : VectorArithmetic {

        guard time < duration + (context.myLinearState.interruption ?? 0) else { return nil }

        if let v = context.myLinearState.from {
            return v.interpolated(towards: value, amount: (time-context.myLinearState.interruption!)/duration)
        } else {
            return value.scaled(by: time/duration)
        }
    }
The following image compares the system .linear animation, and our custom animation both returning false and true for shouldMerge(). Check Example4() in the gist file for the full code:
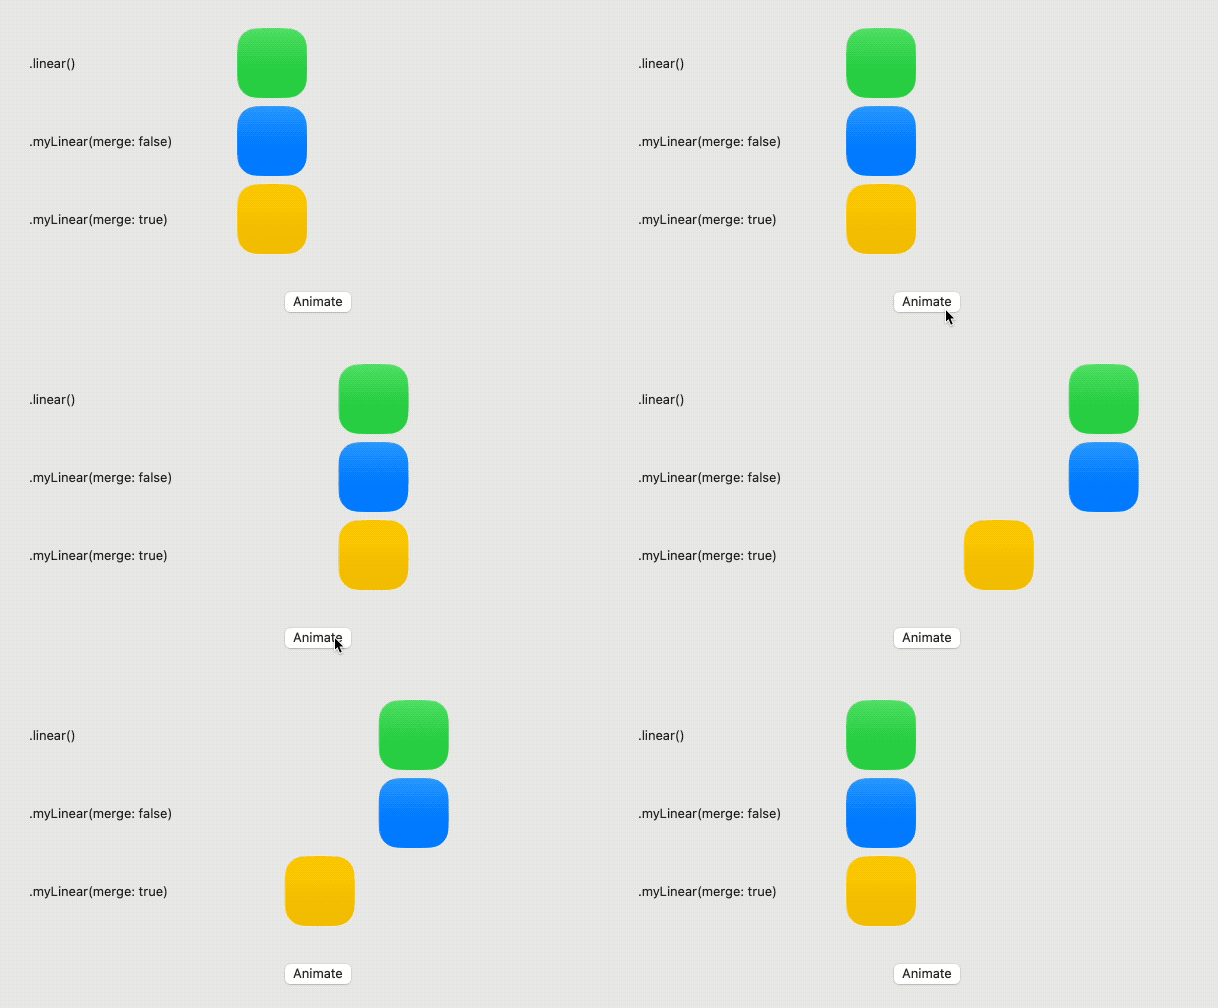
Notice how in our new merging implementation (yellow), movement is linear at all times, and we managed to keep the overall time of the animation the same in all cases.
CustomAnimation: func velocity()
When animations merge, to achieve a smooth transition, the new animation may request the original animation’s velocity at the moment of the merge. In our previous example, we didn’t need to check for velocity because we were seeking an abrupt change. We wanted all changes to occur strictly linearly.
Your view of the velocity() method will be different if you are writing the code for the original animation, the interrupting animation, or both. When you are writing the interrupted (original) animation, your implementation of velocity() will be called (usually by the shouldMerge() method of the interrupting (new) animation). On the contrary, if you are writing the code for the interrupting animation and your implementation of shouldMerge() returns true, you will probably want to call the interrupted animation’s velocity() method to integrate it into your calculations. In general, you have to pay attention to both cases, as animations can often be both: interrupted and interrupting.
It is worth pausing here for a moment to contemplate what velocity is. Velocity encompasses both the speed and the direction of an object’s motion. Now, let’s delve into the definition of speed: we can define it as the magnitude of change within a specified amount of time. It’s important not to confuse speed with acceleration. The concept of direction is self-explanatory, but we will later explore its specific implications in the context of SwiftUI animations.
For a linear animation, the velocity function should be:
func velocity<V>(value: V, time: TimeInterval, context: AnimationContext<V>) -> V? where V : VectorArithmetic {
        return value.scaled(by: 1.0/duration)
}
Remember that scaled(by: 0.0) typically represents the initial value of the animation, indicating when nothing has changed yet. On the other end, scaled(by: 1.0) represents the entirety of the change produced when the animation has concluded. In a linear animation, the speed remains constant throughout, so the function should consistently return the same value: scaled(by: 1.0/duration). In other words, it indicates how much the animation scales per second. For example, if the animation lasts for 4.0 seconds, in one second, it would have scaled by 1.0/4.0 = 0.25.
Now, let’s consider the concept of direction. As previously mentioned, velocity encompasses both speed and direction. In this context, whether the scaling is positive or negative can be seen as indicating the direction in which the change is produced.
Velocity Values (Example #5)
To visually illustrate velocity, we will have our custom linear animation interrupted by a Spring animation. It’s a known fact that SwiftUI spring animations utilize the velocity of the interrupted animation to incorporate it into their changes. Therefore, in this case, the spring’s shouldMerge function will call our custom animation’s velocity method.
In the following example, we will compare our linear animation with three different velocity values. In the middle of the linear animation we will interrupt with a spring and see the results.
The first example is the right velocity (1.0/duration), and the other two will be greatly exaggerated values (-5.0 and 5.0):
return value.scaled(by: 1.0/duration)

return value.scaled(by: 5.0)

return value.scaled(by: -5.0)
The following capture shows how the linear animation is interrupted by the spring animation:
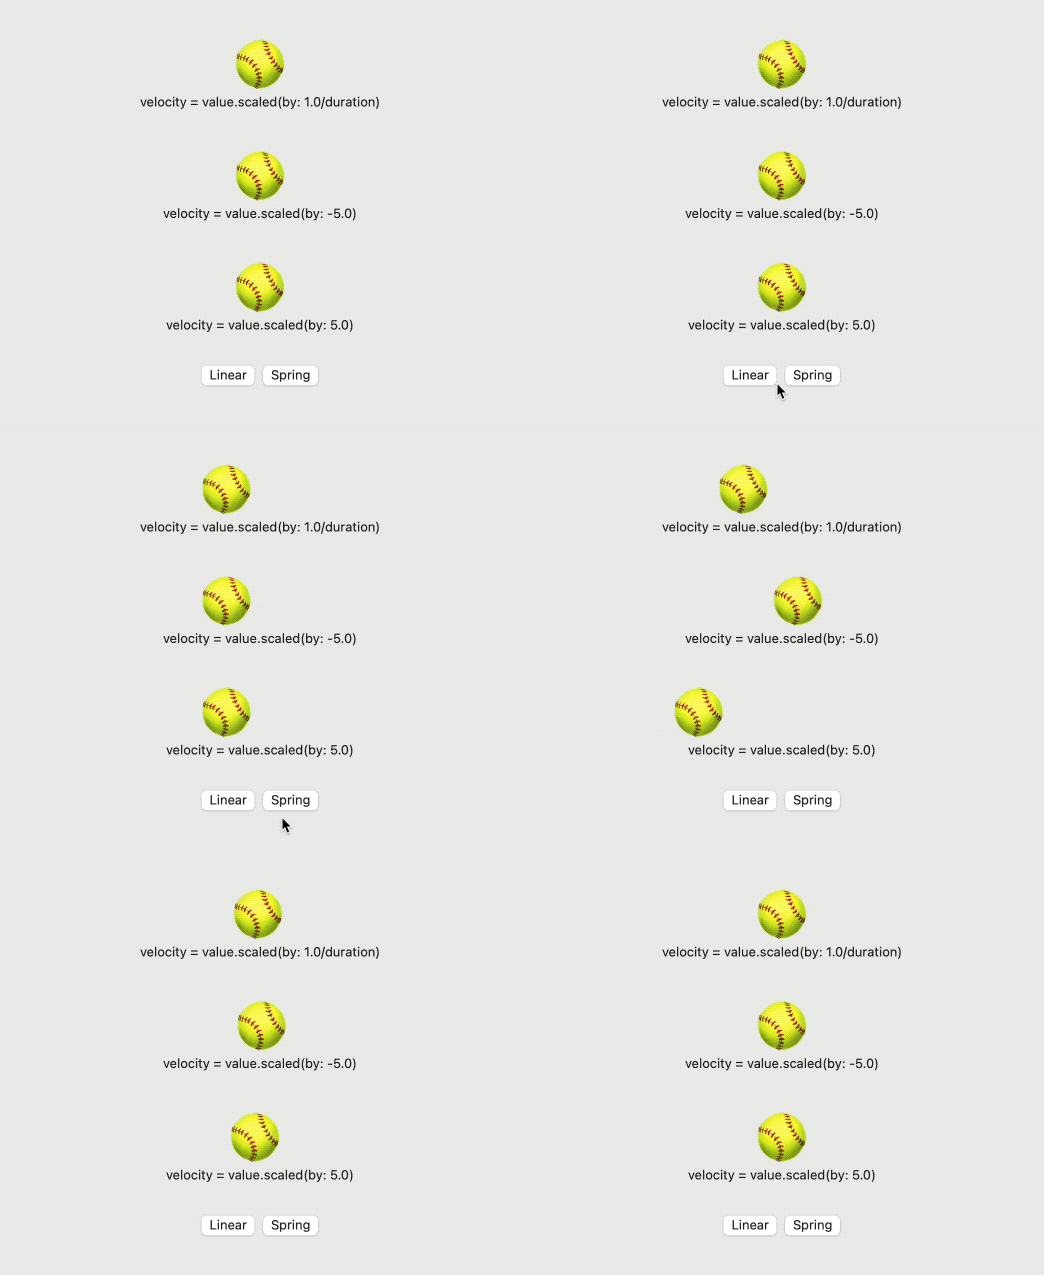
For the full code, check for Example5 in the gist file reference at the beginning of this article.
Debugging Custom Animations Tips
If you encounter difficulties achieving your desired animations, here are some tips that can assist you in figuring out why.
Tip #1
I previously mentioned that your custom animation should be agnostic to the actual value being animated. However, during development, you might want to log the values you receive and the values you return. Even though you may not know the specific type behind the VectorArithmetic value, you can still access its value. The simplest approach is to print the value to the console.
func animate<V>(value: V, time: TimeInterval, context: inout AnimationContext<V>) -> V? where V : VectorArithmetic {
   guard time < duration else { return nil }

   let r = value.scaled(by: time/duration)

   print("TIME: \(time)\nVALUE: \(value)\nRETURN: \(r)")

   return r
}
The output for one of the last calls to animate() will be something like this:
TIME: 1.9891413750010543
VALUE: AnimatablePair<AnimatablePair<CGFloat, CGFloat>, AnimatablePair<CGFloat, CGFloat>>(first: SwiftUI.AnimatablePair<CoreGraphics.CGFloat, CoreGraphics.CGFloat>(first: -100.0, second: 0.0), second: SwiftUI.AnimatablePair<CoreGraphics.CGFloat, CoreGraphics.CGFloat>(first: 0.0, second: 0.0))
RETURN: AnimatablePair<AnimatablePair<CGFloat, CGFloat>, AnimatablePair<CGFloat, CGFloat>>(first: SwiftUI.AnimatablePair<CoreGraphics.CGFloat, CoreGraphics.CGFloat>(first: -99.45706875005271, second: 0.0), second: SwiftUI.AnimatablePair<CoreGraphics.CGFloat, CoreGraphics.CGFloat>(first: 0.0, second: 0.0))
After you clean it up, you can see the vector has 4 components, all CGFloat, with the following values:
TIME: 1.9891413750010543
VALUE: -100.0, 0.0, 0.0, 0.0
RESULT: -99.45706875005271, 0.0, 0.0, 0.0
Tip #2
If you want to be more sophisticated and wish for a more legible output, instead of printing it straight, you could use Reflection (Mirror) to extract the data you need. There is already plenty of information on how to use Mirror, so I will not cover it here.
Summing It Up
This year’s addition to the series of animation articles is presented as a multipart series. In this initial installment (part 6 overall), we explored the creation and utilization of the CustomAnimation protocol.
I hope you found this blog post helpful, but the journey doesn’t end here. In upcoming posts, I will be covering other interesting animation features brought by WWDC ’23.
To stay updated and not miss out on the latest updates, follow me on 𝕏 (@SwiftUILab), where I will be posting notifications when new articles are available.

I am incredibly happy that you are back Javier! Your articles are always amazing and an inspiration to me, and many others.
Thanks you Andrew! There are more articles on the way 😉
I found your article very useful. It’s hard to find such a rich article like this in SwiftUI these days. Thank you!
Is there any way that I can subscribe to your newsletter or something like that?
Thank you Amir! I don’t have a newsletter, but you can follow me on X (check the link at the top right corner of this page). Whenever I publish a new post, I tweet about it.
Thanks Javier for the awesome article, like always!
Custom animations are a very interesting (and powerfull) new feature of SwiftUI, alongside phase and keyframe, which could be have additional love from apple in the future
For example it is really difficult to have a view that is animated continously (example changing color and position of childs), and then after tap the animation changes to another kind of loop animation
I’ve tried multiple solutions but still phase animator is not as powerfull has an imperative UIKit/CoreAnimation declaration, at the end i’ve used recursive withAnimation that changes based on internal if/else
Absolutely, there is still room for improvement! I’m looking forward to next year. I suggest you file feedback to Apple. I think it helps if you provide concrete use cases where the request feature is useful. I have no inside information on how they work, but I think use cases increase the chances of it being implemented. 😉
Your series on SwiftUI animations has been my go-to resource for understanding and implementing advanced animations. Part 6’s exploration of CustomAnimation is fantastic! Your explanations are clear, and the accompanying code snippets make it easy to experiment and learn. Keep up the excellent work!
Thanks! More is on the way.